Announcement

Collapse
No announcement yet.

Off Road Trailer (Truck Bed) Build

Collapse
X
 
  • Filter
  • Time
  • Show
Clear All
new posts

  • Off Road Trailer (Truck Bed) Build

    I started this thread on another board, but figured I would cross post some of it here, in case anyone is interested. The basic idea is to have a pretty much self-contained camping trailer that can be taken off-road. We like to do remote / dispersed camping, and the average tent trailer will not withstand the terrain as well.

    I bought this trailer a couple of years ago, and have had many plans for it that I have dragged my feet on starting. Partly due to funds, partly due to laziness. I accomplished a few very small goals, but I am finally getting ready to start my build in earnest.

    The trailer is a first Gen Ford Courier (1971 - 1976). The previous owner(s) had already completed a good amount of work on it and when I bought it, it was road worthy and already useful. The day I bought it:


    My first addition to the trailer was a side table.


    My first use on a longer trip (a week on the Alpine Loop):


    It performed well, although on our way back from that trip we were rained on for a few hours. Everything in the trailer was safe to get wet, but after that trip I decided that I wanted to find a topper for it to minimize the impact of rain, and to eliminate the worry of smaller items slipping out from under the straps and blow away on the highway. It would also be nice to be able to have some ability to lock up the contents of the trailer.

    I was watched CL for a topper for it for some time, and finally found one that met all of my needs. In addition to fitting, and being very light, it also had locking access points on both sides. This is pretty much where it sits today (excuse the dirt):


    (to be Con't)

  • #2
    We are planning on spending another week up in Colorado this summer. In preparation I have the following plans to be completed by then:
    • CVT Mt. Rainier RTT w/ Annex (Received)
    • CVT "79" Awning (Received)
    • 3500lb trailer axle (still has truck axle, over the springs)
    • Upgrade Tail-lights to LED (1/2 way done)
    • Fenders (axle will be wider than current to give more stability and more closely match track of tow vehicle)
    • Cap Rack to mount RTT and Awning
    • Strip remaining tint from cap windows and black them out (all stripped, need to paint 2)
    • Stabilizer Legs (Received)


    All of that should be purchased over the next couple of weeks, and installed no later than mid-June. I will track progress here.

    Longer term, I also intend to complete the following. This may change, but my goals are:

    Redesign / lengthen tongue
    The trailer is a bit short behind the Suburban. It tows great but is a little tricky when backing up. I would also like the additional tongue space to mount the fore-mentioned tool box. Or, alternatively, I plan on picking up a Yamaha TW200 to take along for trail riding, so I may just set up a spot to haul the bike.

    Set up tongue with 2" receiver
    So that I can swap out ball hitch with Lunette for offroad use (as needed).

    Add battery / lights
    Nothing crazy, just want to be able to hook up a light or two inside the cap, one facing the "table" side of the trailer, and probably a small-ish inverter.

    Water Tank
    Would like to mount a tank (or tanks) under the bed. Somewhere between 10 - 20 gallons would be preferable. Possibly a small pump as well, which would give me another use for the battery.

    Slide out bed tray
    I would like to partition off the side windows (will explain in ,ore detail later) and add a slide out tray for the bed. The primary purpose of the slide out bed would be to make it easier to reach items towards the front of the trailer. This one is a big maybe though. Everything I plan on having in the bed will be in Action Packers, so I may find that a slide out tray is unnecessary.
    Last edited by Chili; 07-01-2014, 09:19 AM.

    Comment


    • #3
      Some details on short term plans:

      The rack I will likely buy to mount the RTT and Awning is this one:


      Based on the specs it will fit perfectly, outside of the cap, without interfering with window access. I had planned on working with one of my friends that welds, but think that this will work well without the headache of a custom build. It will hold the weight needed and will only require very minor modification, if at all.

      I plan to set up the RTT and Awning on opposite sides. The Awning (on the passenger side) will be over the "kitchen". Here is a basic example, but mounted on my trailer, rather than a minivan (pic from CVT website). I don't think I will be buying the netting for the awning, after further consideration:

      Comment


      • #4
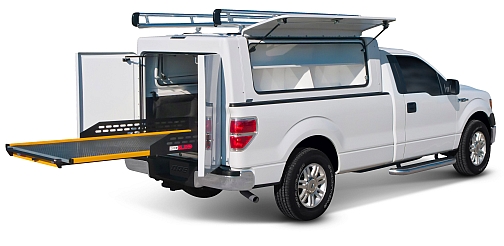
        As I mentioned, I would like to separate the side window sections from the rest of the trailer interior. Something like contractor toppers:


        The awning / kitchen side would be for storage of kitchen items, utensils, dry / canned foods, spices, etc. The opposite side would be accessible from within the RTT Annex, and would be for clothing and personal items for my wife and I. I have some basic design ideas in mind, but have not detailed anything yet.

        Forgot to add - Stabilizer jacks for the rear of the trailer:

        SJ-100 Stabilizer Jack
        SOUTHWEST WHEEL? is a distributor of steel truck wheels, trailer parts, trailer axles, hitches, brake controllers, and more. Catering to all major Texas cities such as Dallas, Lubbock, Houston, Austin, San Antonio, Corpus Christi, Midland, and Waco, and ship nation wide.

        Comment


        • #5
          After getting the trailer in the garage and starting some of the smaller projects, I have learned that I am not going to be lifting it as I thought I was. As it is it will barely fit into the garage, which is where it will be kept once the tent and such are installed. Oh well, I think it will still do everything I want it to. I am somewhat limited offroad by my tow vehicle anyways.

          Updated earlier posted plans.

          Comment


          • #6
            I have started on a couple of the smaller items I want to complete but have been too lazy to post up pics.

            The camper windows were tinted, but not very dark and the tent was pretty much trashed. I really don't want or need visibility through the windows so I decided to just strip the tint and black out the windows from the inside. I went ahead and used plastidip so that it can be easily removed if I change my mind on this.

            Stripping the old tint. You can see poor condition of it in this pic:


            Masked off and first coat applied:


            It took about 3 coats to completely cover it. I didn't realize that Plastidip was so "runny" when being applied:


            Outside view once completed. I am prety happy with the look. It basically appears as 5% tint from the outside:


            Two more windows to go.. I have already stripped the other two, just need to mask them off and spray them.

            Comment


            • #7
              As for the tail lights, the stock units were there, and were actually wired up when I bought the trailer (albeit incorrectly for the 4 pin it was using) but were very dim, even with good bulbs. I decided to use LED trailer lights (submersible type) to replace them. The challenge was that the lights I bought were designed to slide snugly into a precisely sized hole. No screws or otherwise. As such, they would not fit properly in the factory tail light position without some fabrication, or Jerry-rigging, at least.

              Although this pic doesn't do a good job if illustrating the fit, you may be able to see the gaps on either side:


              While contemplating the issue, I had the factory unit and replacements sitting next to each other, and realized that except for depth, the new lights actually fit inside the factory housing. With a little cutting and grinding, I was able to get the new piece to fit. This solves the fitment and mounting issues, as I can still using the factory mounting even after modification.

              New light with black rubber (mount) removed:


              Left light completed, right is "before":


              Rear view, before and after:


              Completed light mounted:


              I'm pretty happy with how it turned out. The rear view isn't very pretty, but the "inner" light is still sealed, so no worry about exposure to the weather.

              The one down side is that the Led's are now effectively passing through 2 red lenses, which does decrease the brightness some, but it is still an improvement over the original bulbs / reflector going through only the factory lens.

              Comment


              • #8
                Couple of pics from when I was "test fitting" my Suburban wheels / tires. The goal was to use the same set-up for both and a matched spare for each. Unfortunately, this would also require a lift, which now looks like is off the table. Besides fitting in my garage, the other concern I would have is that the tent would be sitting pretty high. I would be worried that the center of gravity would be an issue.

                If I weren't mounting a tent to it, I would probably still do it. It looks pretty good, IMO:


                To match the track width of the Suburban, I would need to widen it stance on the trailer. Of course, that would also necessitate fenders:


                I may revisit this in the future, as I would really prefer to have the matching wheels and tires. I just wouldn't want to have to remove the tent to get the trailer in my garage, would not want to leave the tent mounted on the trailer outside, and do not want to have to remove the tent after every trip. One of my main goals with this trailer is to be able to leave the bulk of my camping equipment in it, so that all I would need to do when heading out is to add the perishables and clothes, and hook up to the truck.

                Comment


                • #9
                  Some details on the side table I built. The goal was simply to have some workspace creating a "kitchen" area, while avoiding buying and carrying a separate folding table:


                  I started by picking up some supplies..

                  Birch Plywood, some 1”x2” pine, Hardware, Polyurethane, Mineral Spirits and a Side Table Kit purchased from www.compactcampingconcepts.com.


                  I glued and screwed the 1”x2” strips to the perimeter and mounted the table leg:


                  Mounted the bracket to the table and trailer:


                  And viola!


                  I did a quick spray on polyurethane at the time, since we were about to head out, but still need to sand and stain / seal.

                  Here is a shot of it in use in CO. Of course, Leah is in the kitchen, where she is supposed to be:

                  Comment


                  • #10
                    What is that you sprayed on the windows? It looks like bedliner, is that right?

                    Comment


                    • #11
                      Originally posted by Hmbre97 View Post
                      What is that you sprayed on the windows? It looks like bedliner, is that right?
                      Plastidip. I wanted to be able to remove it easily if I changed my mind later:

                      Comment


                      • #12
                        Originally posted by Hmbre97 View Post
                        What is that you sprayed on the windows? It looks like bedliner, is that right?
                        lol
                        Originally posted by BradM
                        But, just like condoms and women's rights, I don't believe in them.
                        Originally posted by Leah
                        In other news: Brent's meat melts in your mouth.

                        Comment


                        • #13
                          Originally posted by bcoop View Post
                          lol
                          not really.
                          "If I asked people what they wanted, they would have said faster horses." - Henry Ford

                          Comment


                          • #14
                            Originally posted by Baron Von Crowder View Post
                            not really.
                            I guess I missed the joke.. I tend to agree with you.

                            Comment


                            • #15
                              If you felt the dip was runny you were probably spraying it on too thick. Project looks cool thougb!

                              Comment

                              Working...
                              X