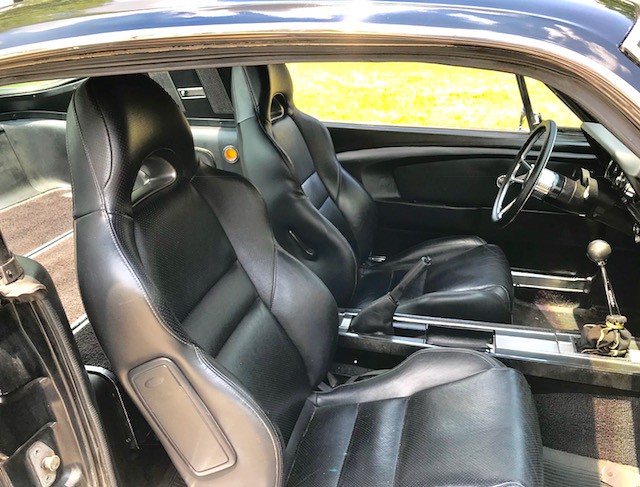
So I wanted something different. I wanted more production value than my worn out flat standard door panels. I love the dimensionality of the pony interior panels, but again, wanted something different that fit with my 2005 Acura RSX seats.
So I did this.
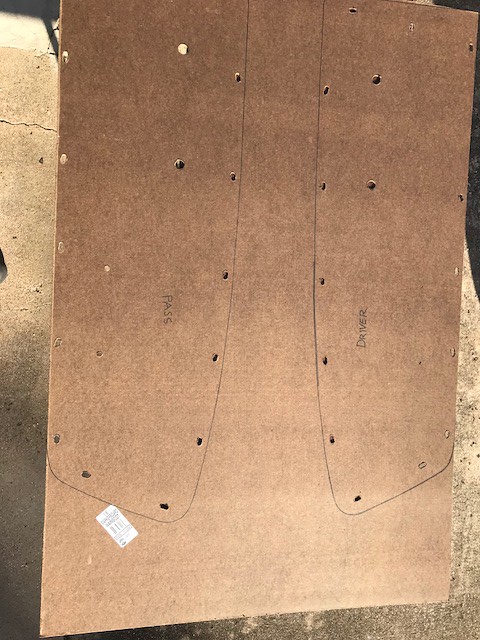
Used an old door panel as a template to cut some masonite the same size. I got the kind with a white board surface on one side, so hopefully that does a good job against water, not that this gets driven in the rain, but whatever.
 CustomDoorPanel1
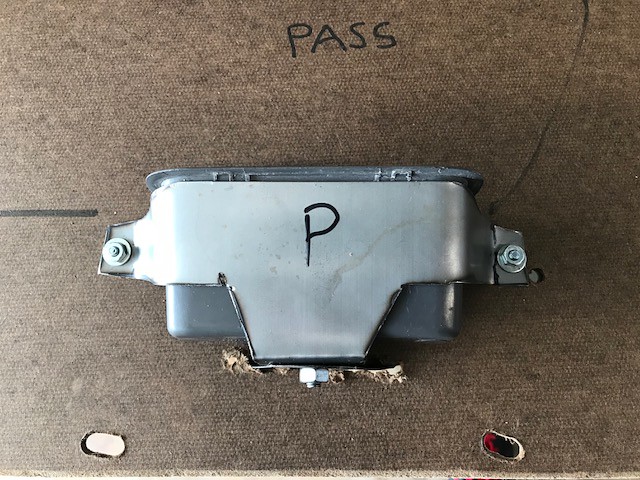
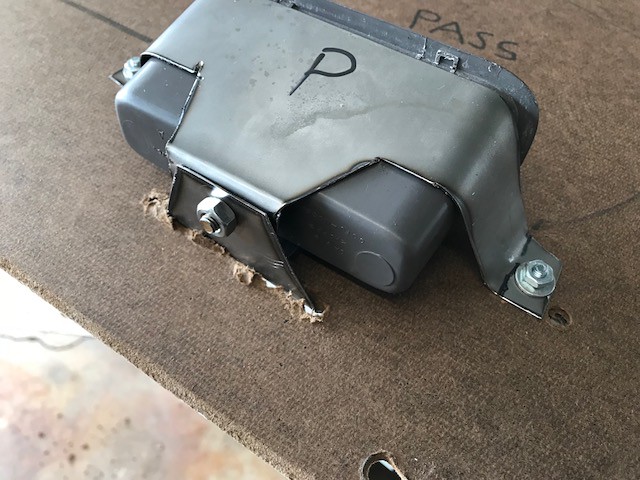
I also built some brackets to make sure the door-pulls were rock solid and actually pulled on the door, not just the panel. The cup is something I got from a Ford Escape in the local junk yard because it looked like the right shape and size.
 CustomDoorPanel2
Since these photos were taken, I had the nut on the bottom welded on to be captive.
 CustomDoorPanel3
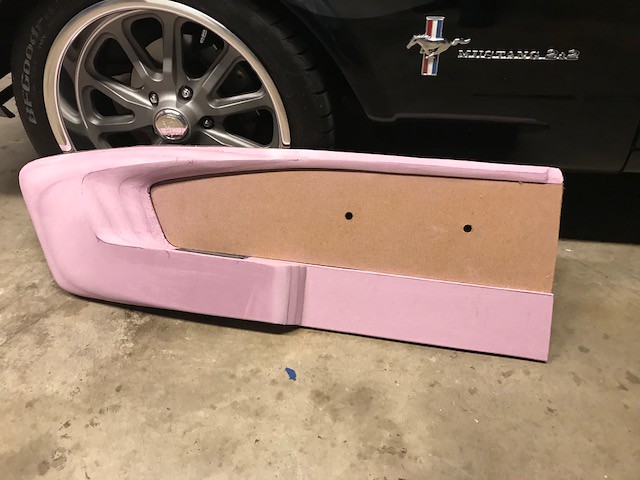
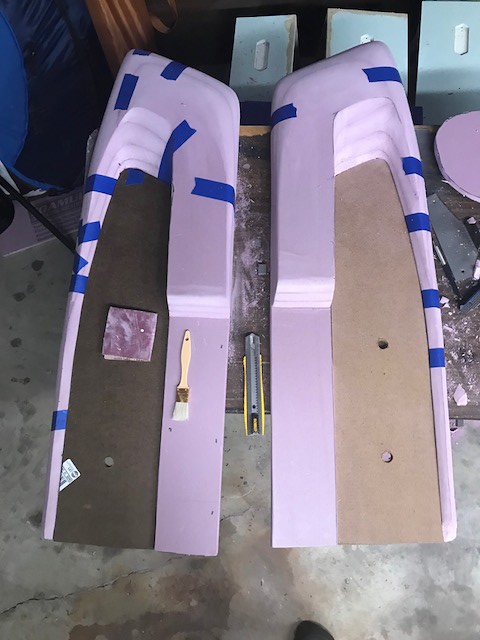
I then spent A TON of time carving and shaping pink insulation board to get the shape I was after, which is similar to pony door panels, but different at the same time. One main goal was to make sure that some of that scallop/contour line was visible with the door closed.
 CustomDoorPanel4
I used wood glue and hot glue where appropriate to stick things together.
 CustomDoorPanel5
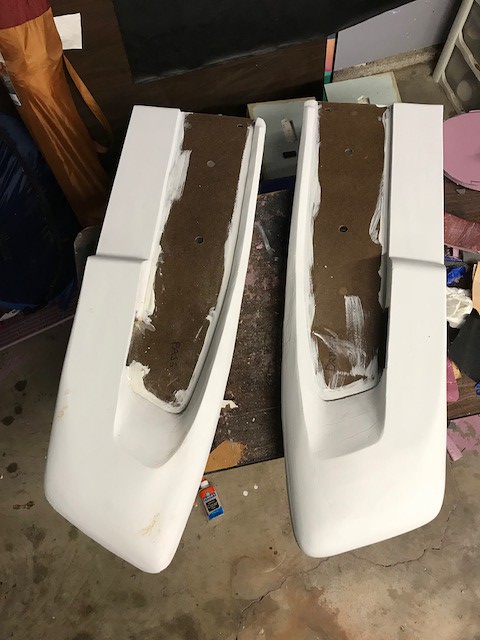
and coated everything with Killz primer.
 CustomDoorPanel6
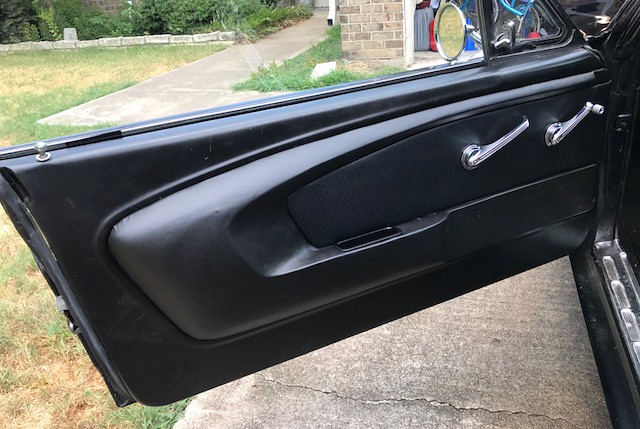
I upholstered the center section in perforated vinyl fabric to match the seats, and used this awesome "4-way stretch" black vinyl fabric for the rest of it. This is an instance where quality of materials made a huge difference. No craft store vinyl is going to work with those compound curves.
 CustomDoorPanel7
 CustomDoorPanel8
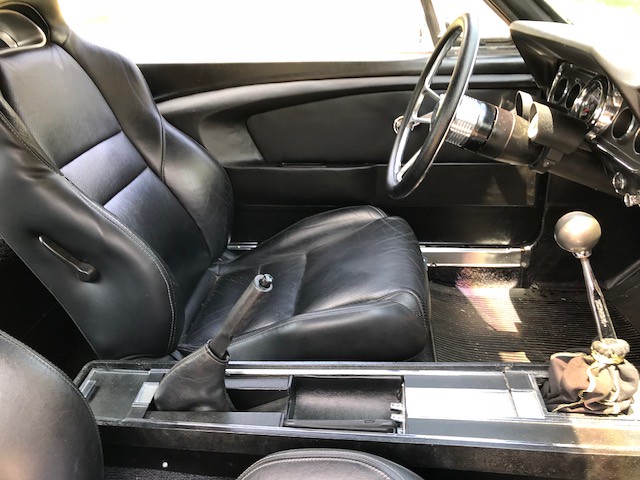 CustomDoorPanel9
What I've learned: This is hard! lol Not the easiest custom thing I've done to the interior for sure. It was faster and more simple to fill the radio hole and cover the dash in vinyl fabric. https://forums.vintage-mustang.com/m...t-s-place.html
This pink foam is sensitive! I already know it's not going to be as impact resistant as I would like, though several coats of that primer did give it some armor. Also, everything makes this foam melt. It was tricky to apply the cement necessary to stick the vinyl down without melting parts, and I still managed to do so a little bit.
V2.0 of this project will probably include some fiberglass mold making to land me with a more durable structure, but for now I'm very happy with the results.
So I did this.
Used an old door panel as a template to cut some masonite the same size. I got the kind with a white board surface on one side, so hopefully that does a good job against water, not that this gets driven in the rain, but whatever.
 CustomDoorPanel1
I also built some brackets to make sure the door-pulls were rock solid and actually pulled on the door, not just the panel. The cup is something I got from a Ford Escape in the local junk yard because it looked like the right shape and size.
 CustomDoorPanel2
Since these photos were taken, I had the nut on the bottom welded on to be captive.
 CustomDoorPanel3
I then spent A TON of time carving and shaping pink insulation board to get the shape I was after, which is similar to pony door panels, but different at the same time. One main goal was to make sure that some of that scallop/contour line was visible with the door closed.
 CustomDoorPanel4
 I used wood glue and hot glue where appropriate to stick things together.
 CustomDoorPanel5
 and coated everything with Killz primer.
 CustomDoorPanel6
I upholstered the center section in perforated vinyl fabric to match the seats, and used this awesome "4-way stretch" black vinyl fabric for the rest of it. This is an instance where quality of materials made a huge difference. No craft store vinyl is going to work with those compound curves.
 CustomDoorPanel7
 CustomDoorPanel8
  CustomDoorPanel9
What I've learned: This is hard! lol Not the easiest custom thing I've done to the interior for sure. It was faster and more simple to fill the radio hole and cover the dash in vinyl fabric. https://forums.vintage-mustang.com/m...t-s-place.html
This pink foam is sensitive! I already know it's not going to be as impact resistant as I would like, though several coats of that primer did give it some armor. Also, everything makes this foam melt. It was tricky to apply the cement necessary to stick the vinyl down without melting parts, and I still managed to do so a little bit.
V2.0 of this project will probably include some fiberglass mold making to land me with a more durable structure, but for now I'm very happy with the results.


Comment