Originally posted by black2002ls
View Post
Announcement
Collapse
No announcement yet.
1/12th Scale 1969 Camaro Build
Collapse
X
-
I think I might be able to do that on my machine. My machine is fucking gigantic, but it can do somewhat impressive small stuff. I'll download an STL if I get a chance and shrink it down to that size."When the people find that they can vote themselves money, that will herald the end of the republic." -Benjamin Franklin
"A democracy will continue to exist up until the time that voters discover that they can vote themselves generous gifts from the public treasury." -Alexander Fraser Tytler
-
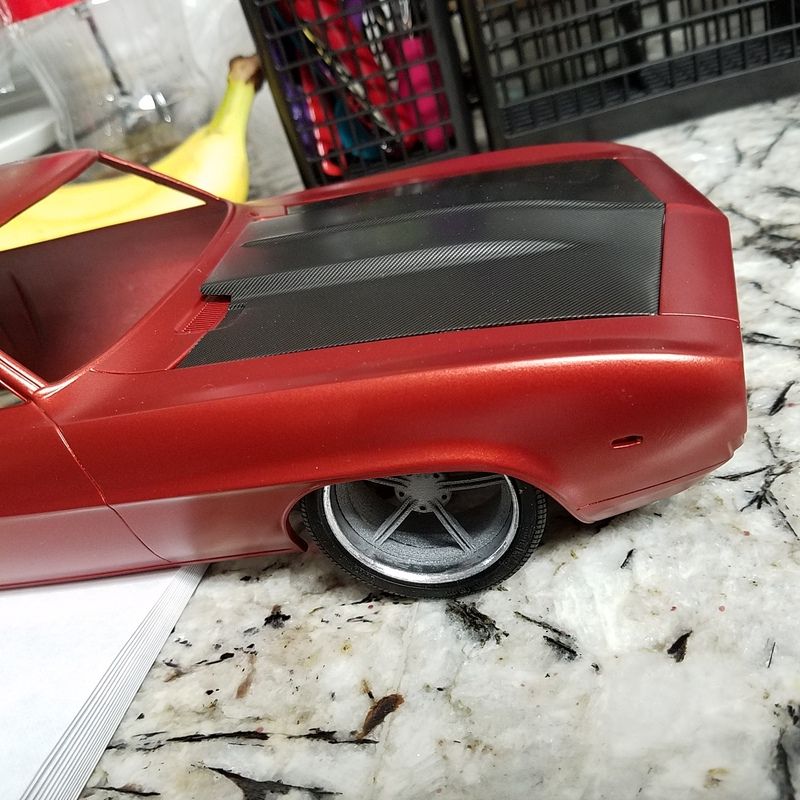
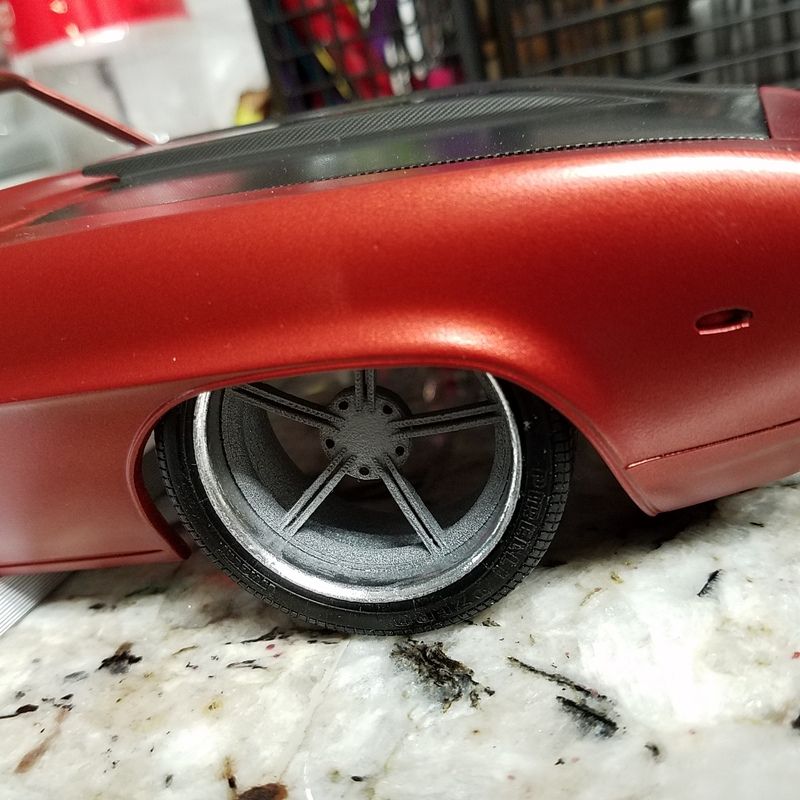
I'm not sure if this was chonicled in this thread, but the wheels for this thing have been a huge problem from the start. 2 different attempts at scratch building wheel centers. Zero luck finding someone to machine wheel sleeves. Then came 3d printing. I designed some wheels, and sleeves. Printed some tests and decided they were on the small side. So, I re designed them printed them, BINGO. Then I find a guy capable of machining sleeves, though in the end tjey didn't turn out like I wanted and decided they were ultimately too big. Back to the drawing board.
Somewhere along the lines I had a buddy out in California send me some tires that he had molded and cast. I got to fiddling with the original prints that I thought were too small and decided that I liked the look. Next step was finding a suitable finish for the sleeves. Either mimicking an aluminum finish (polished, maybe brushed) or chrome. Well, along comes molotov chrome paint pens. People are getting pretty convincing results with them. So, I gave it a shot on my test prints. I smoothed the sleeves out a bit and hit it with the chrome. I didn't spend enough time getting the sleeves smooth as glass since it was just a test. But, I think I've solved the problem that has plagued this build for the last decade....
Sent from my SAMSUNG-SM-G930A using TapatalkOriginally posted by LeahBest balls I've had in my mouth in a while.
Comment
-
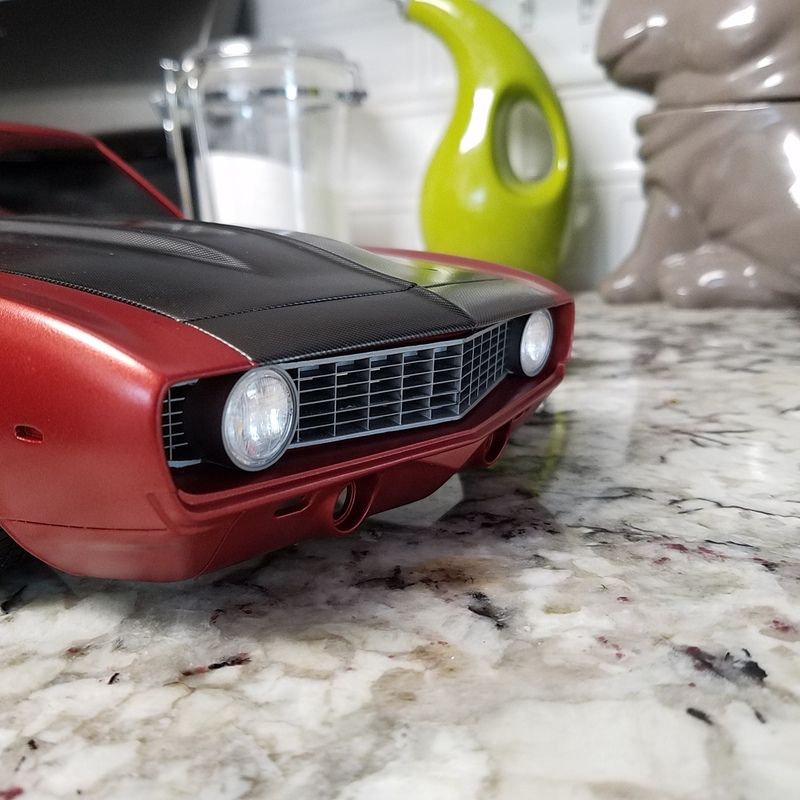
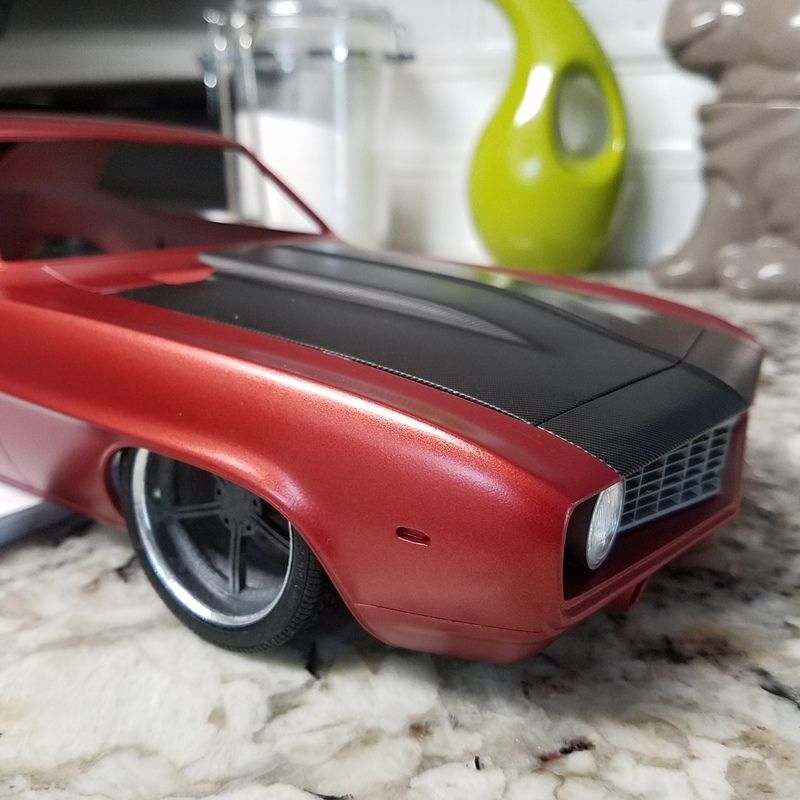
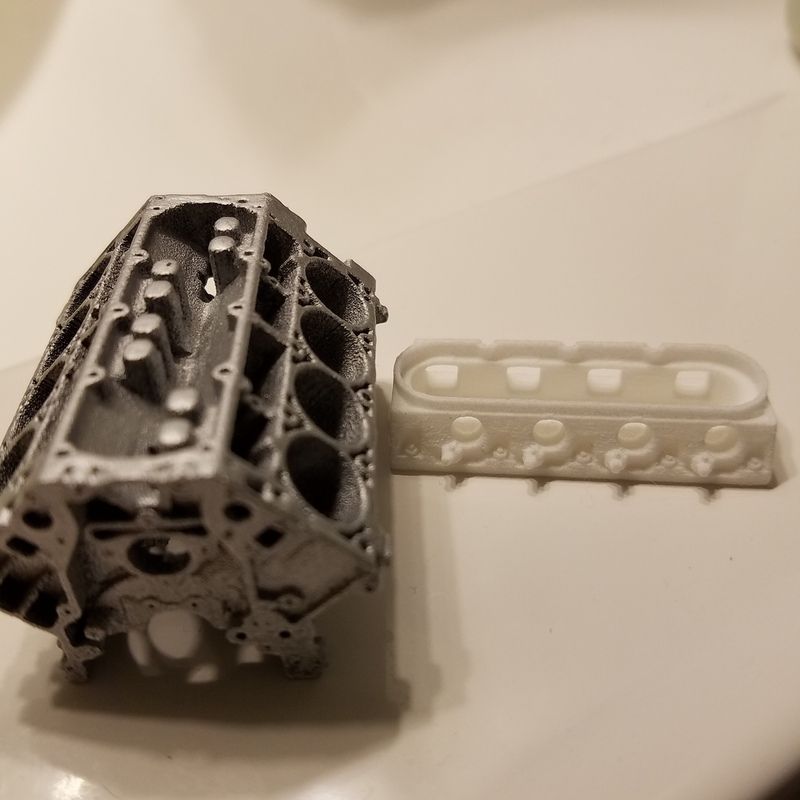
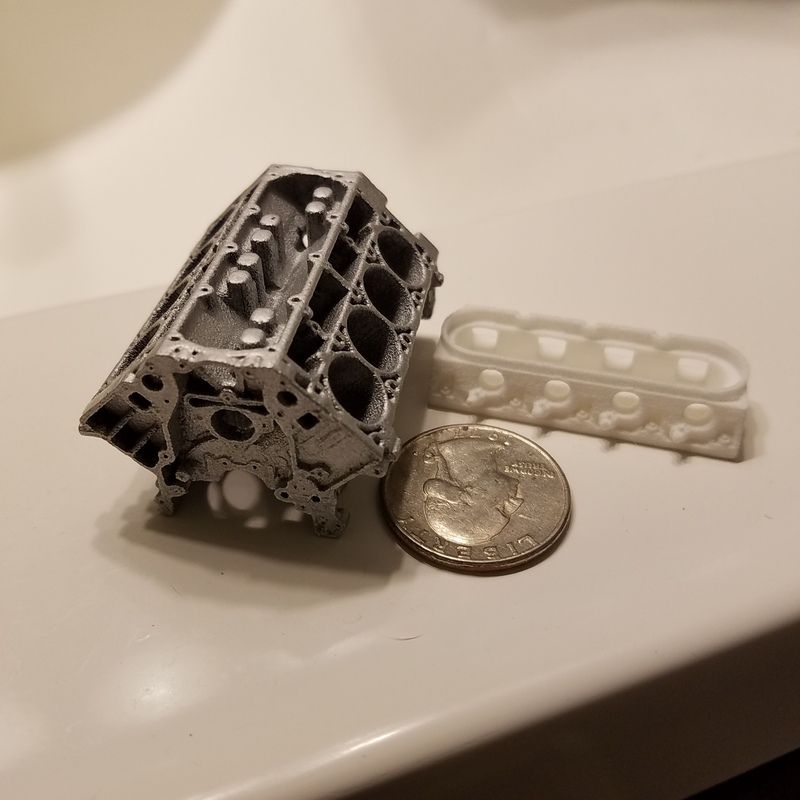
Well. It rained most of the night and morning here which means it is too dang humid to work outside. Sooooo. What do you do while the wife and kid take a nap. Work on a model! I got the CF finished up on the main body. Jist need a little black touch up then I can clear it. I picked up one of Ron's LS motors. Unfortunately I cheaped out and got WSF instead of FUD. It is quite grainy. I'm OK with the block. It has a cast look to it. I hit the oil pan with some 400 paper and then testers magnesium metallizer. The block is generic aluminum. With a matte coat. I need to order heads and valve covers in FUD. I also put a second coat of chrome on the wheel sleeve and hit the center with Tamiya gunmetal.
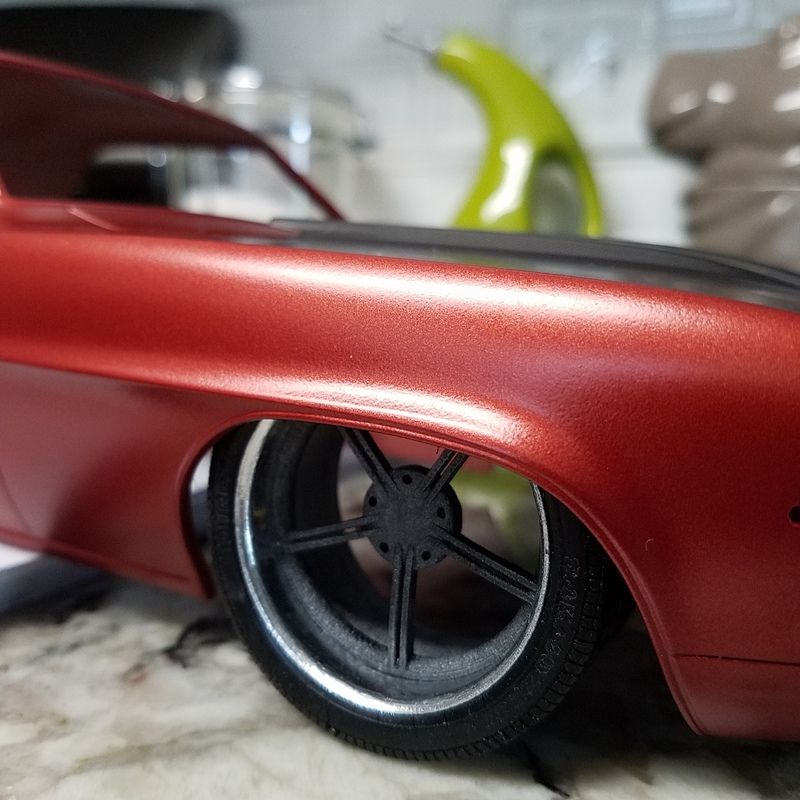
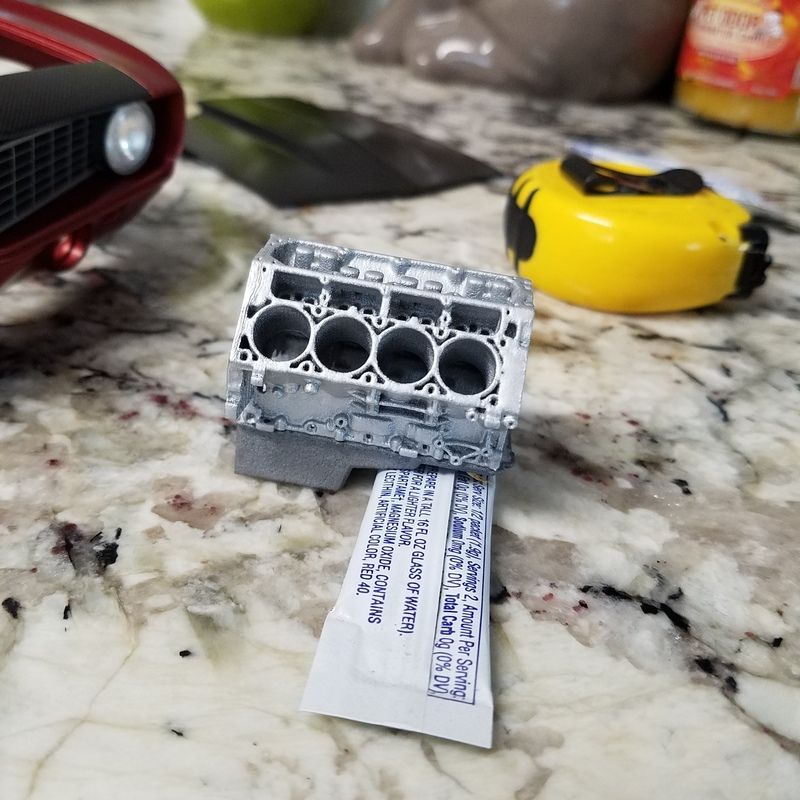
Sent from my SAMSUNG-SM-G930A using TapatalkOriginally posted by LeahBest balls I've had in my mouth in a while.
Comment
-
Not a huge update, but figured I would chronicle some of the growing pains.
Moving to the smaller wheel means I need to change the size of the brakes that I drew up in Solid Works. I'm hoping to be able to accomplish this in the shapeways terminal and not have to completely re-draw parts.
Here are a couple of shots of the wheel size that I will be using. The aluminum ring has the same ID and OD as the printed sleeves, and of course a shot with the brakes behind the current wheels.
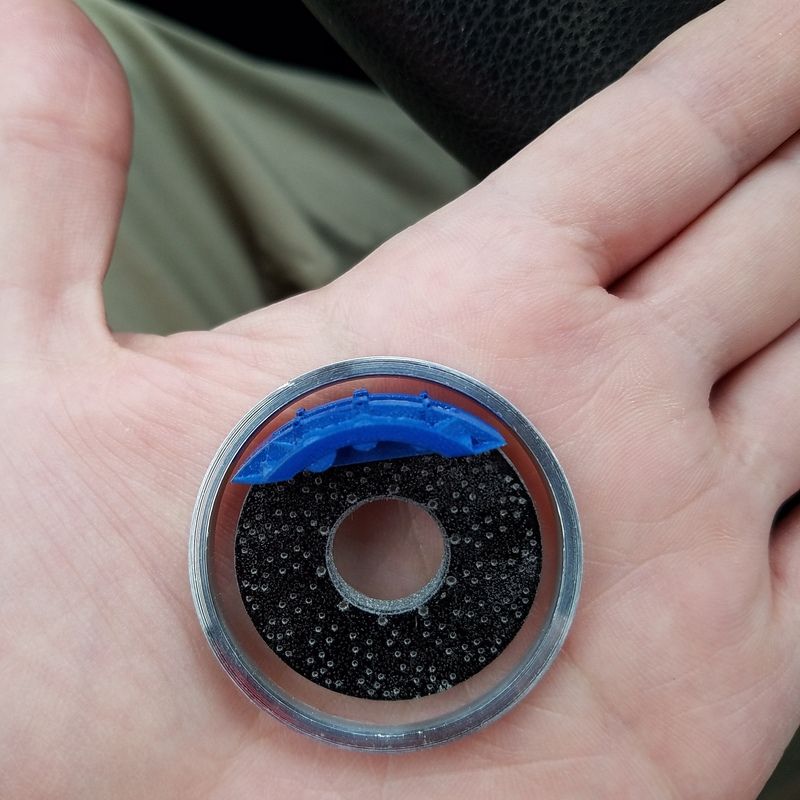
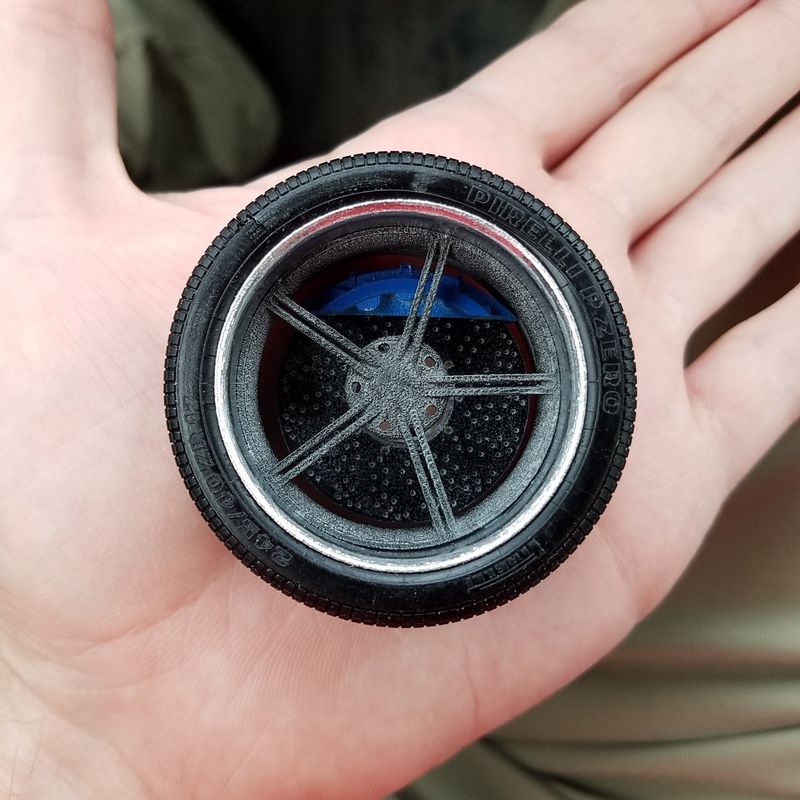
Hopefully I can find the time to scale the brakes this weekend and order some test prints to make sure that everything fits correctly after the changes.
You can really see the printing process on this wheel center. This was a prototype print in a cheap material to check size, fit, and design. I have scaled down the "big" wheel to the same diameter as this wheel, so hopefully the spokes come out a bit thicker when I get the test prints.Originally posted by LeahBest balls I've had in my mouth in a while.
Comment
-
Well, a box of goodies showed up today! Whipple, TKO500, bell housing, and other misc goodies. I should have consulted with Ron on the bell housing. The mounting flange on the T5 doesn't match the bell housing, but that is an easy fix! The whipple is a very nice piece and the conical air filter mates right up. I will probably remove the fuel rails and injectors and create my own. I need to pull a few refence photos, it looks like the way the whipple is going to sit, I may need to scratch up a valley cover for the LS. Time to start counting for machined bolts and goodies!
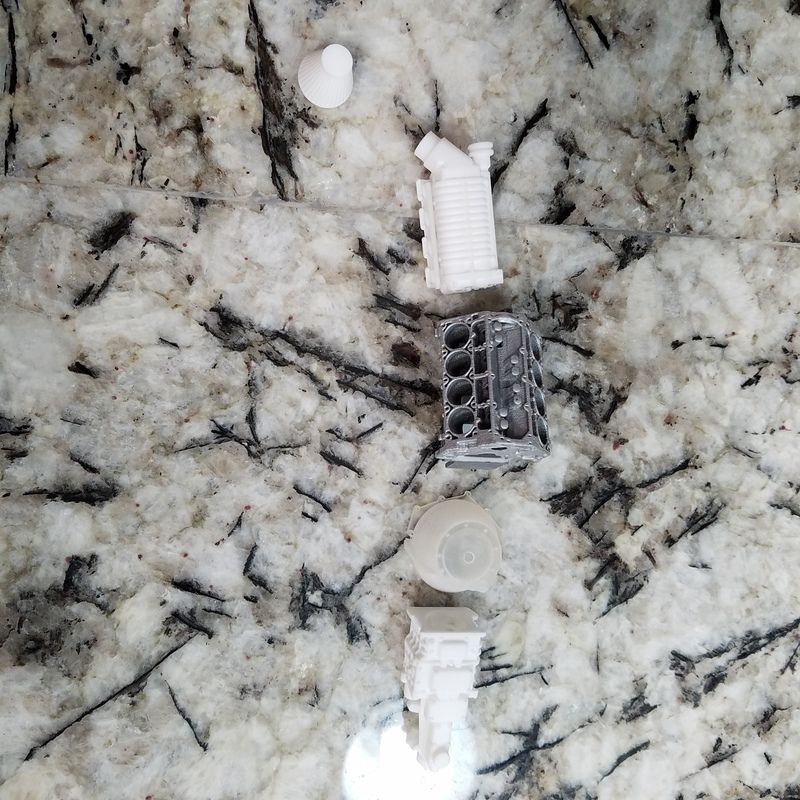
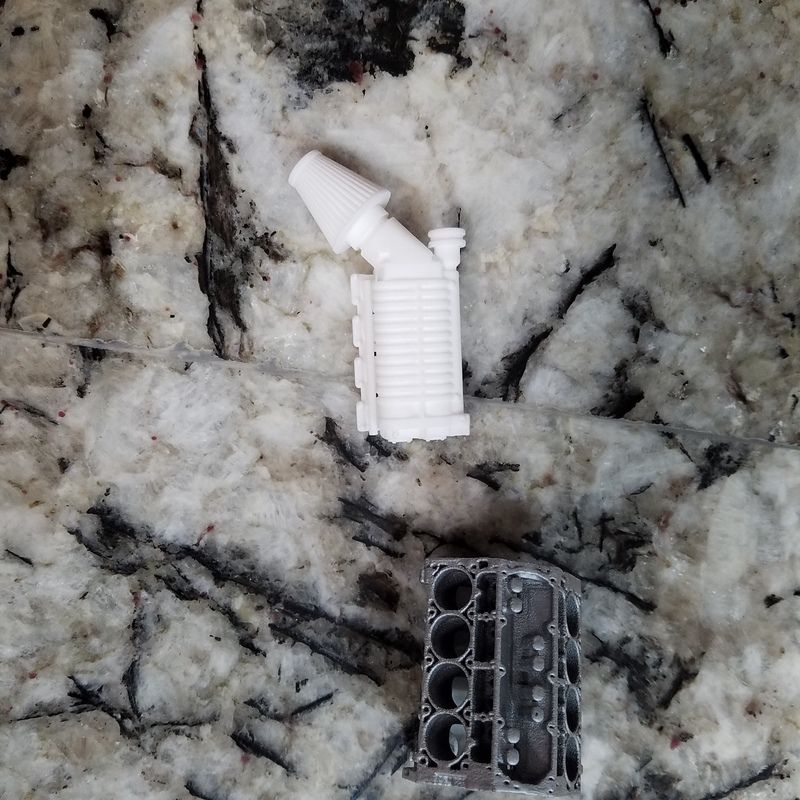
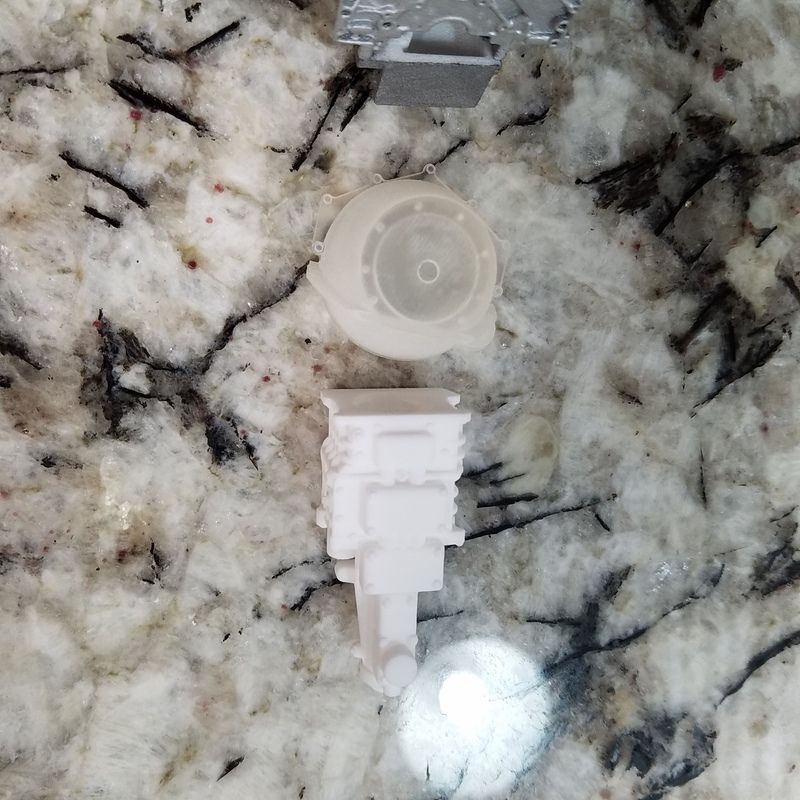
Sent from my SAMSUNG-SM-G930A using TapatalkLast edited by black2002ls; 07-11-2017, 01:32 PM.Originally posted by LeahBest balls I've had in my mouth in a while.
Comment
-
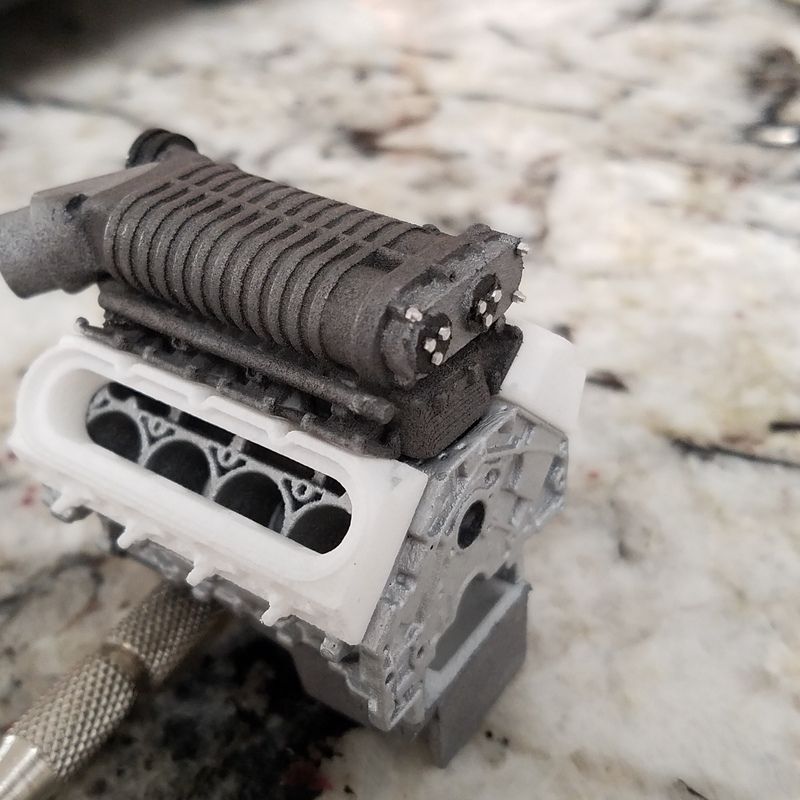
Put some color on the whipple this evening. The color on the body is burnt iron, magnesium on the TB and the backplate, semi gloss black on the pullies. I added some machined aluminum bolts the the back plate. Lots of detail still to add, but it is a start.
Due to this being a single unit, the fuel rails, injectors, and TB will be used and detailed. The only way to really super detail this thing would be for it to be printed in multiple pieces, or to cut it up. I feel that with some wiring, fittings, and paint it will ve convincing once it is nestled into its home. I will be adding some more detail to the TB to look like a DBW unit.
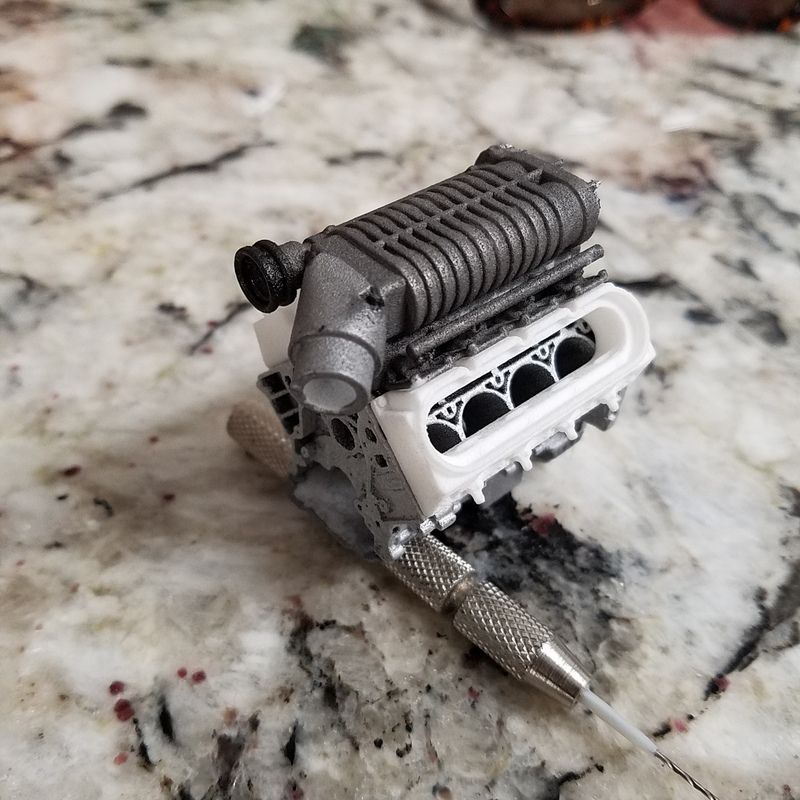
Sent from my SAMSUNG-SM-G930A using TapatalkOriginally posted by LeahBest balls I've had in my mouth in a while.
Comment
-
I love this thread. Nice work!Originally posted by PGreenCobraI can't get over the fact that you get to go live the rest of your life, knowing that someone made a Halloween costume out of you. LMAO!!Originally posted by Trip McNeelyGo do a whooly in front of a Peterbilt.Originally posted by dsrtuckteezydont downshift!!
Comment
-
Thanks. It is about to get real interesting. I'll be ordering a bunch of machined bolts and a/n fittings later this week, once I get all of the sizes sorted out. I used to have a conversion list that had all of the sizes needed for 1/12th scale on it, however, over the years it got misplaced.Originally posted by DON SVO View PostI love this thread. Nice work!
You have no idea how many times it has either almost made it to ebay, garage sale, or just trashed all together!Originally posted by ELVIS View Postman, this is a true labor of love. i would have wadded this whole damn thing up 100x's by now! looks killer brother!
god bless.Originally posted by LeahBest balls I've had in my mouth in a while.
Comment
-
Have you considered using xtc epoxy over your 3d printed parts so you can get a smoother surface?"When the people find that they can vote themselves money, that will herald the end of the republic." -Benjamin Franklin
"A democracy will continue to exist up until the time that voters discover that they can vote themselves generous gifts from the public treasury." -Alexander Fraser Tytler
Comment
-
I'm not familiar with it. Is it a self leveling epoxy?Originally posted by CJ View PostHave you considered using xtc epoxy over your 3d printed parts so you can get a smoother surface?
Some of the more rough parts, I ordered that way intentionally to retain the cast/textured look. I think I am going to go at the whipple with a fine grit paper and smooth out a few areas of it.
I'm trying to convince myself that reducing the amount of detail is in my best interest to get this thing finished. Trying to be realistic about what is going to be seen when it is in the engine bay with all of the other details. Do I need this bolt, or that bolt, will the texture be seen? If it is seen will it be noticeable and if so, how out of scale or unrealistic is it?
After this thing is done I've got 3 1/12th scale Mustangs, a 1/12th scale S-10, and a truck load of 1/24-25th scale stuff that is all mid project.Originally posted by LeahBest balls I've had in my mouth in a while.
Comment
-
I got a surprise when I checked the mail this evening! All of the bolts and A/N fittings that I ordered last weekend showed up. I was expecting it to take much longer!
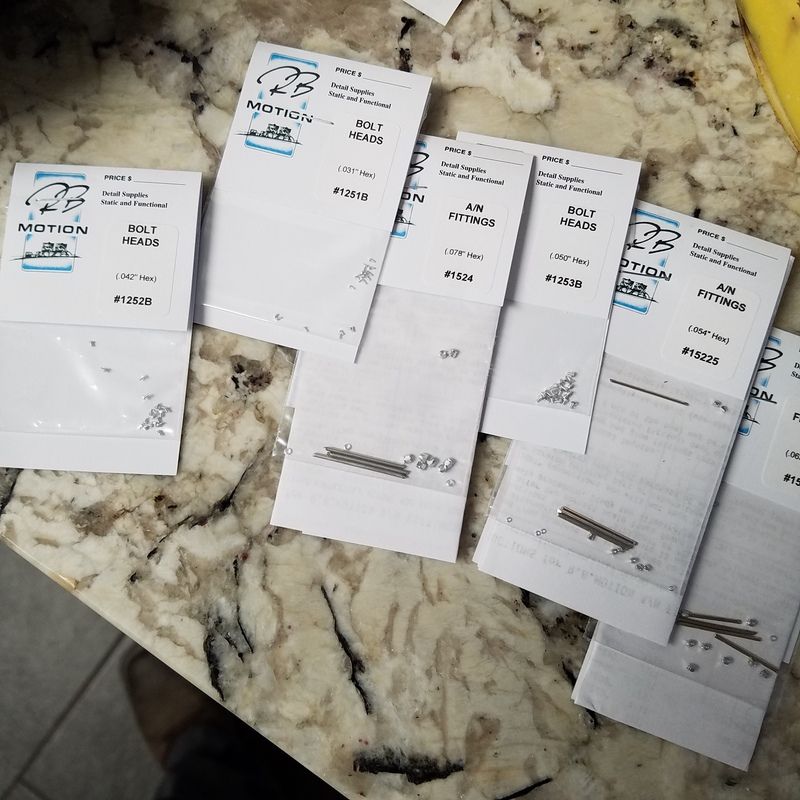
Now I have to decide if I want to go with black fittings and line or traditional red/blue with stainless line!
Sent from my SAMSUNG-SM-G930A using TapatalkOriginally posted by LeahBest balls I've had in my mouth in a while.
Comment
-
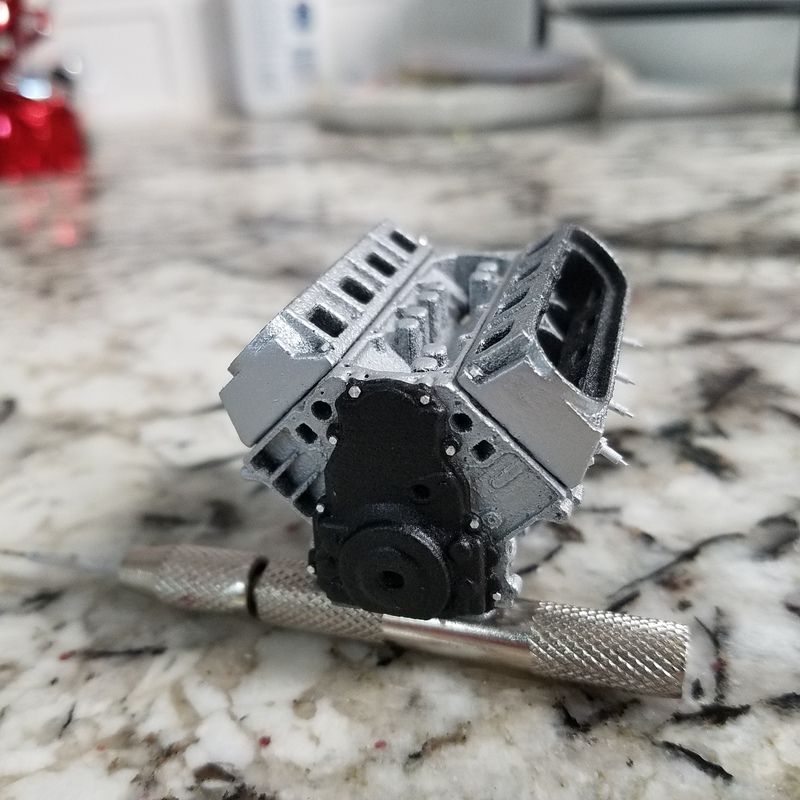
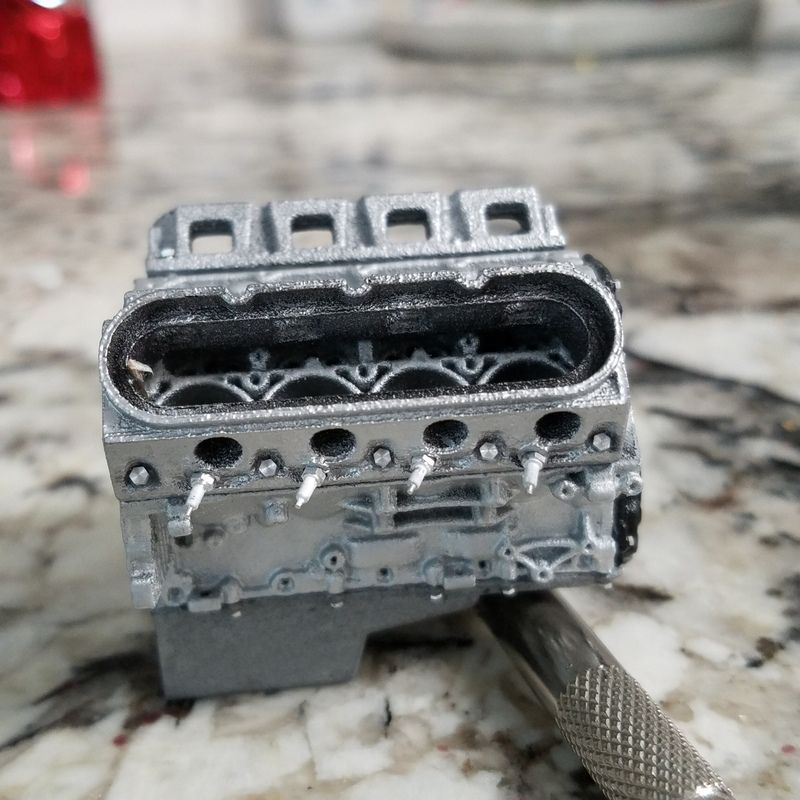
I managed to get some detailing and painting done this afternoon. Heads were painted with alclad aluminum. Added some RB motion spark plugs and then bolts in the visible locations. I saw a pic of a LSX 376 for novakane that had a black front cover, so I went that route for some contrast
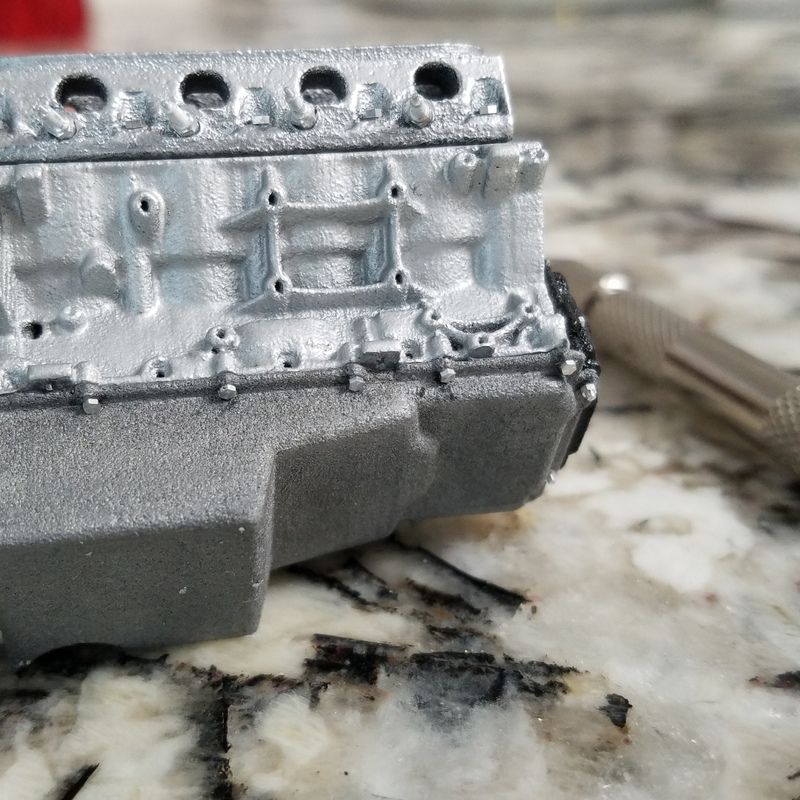
Sent from my SAMSUNG-SM-G930A using TapatalkOriginally posted by LeahBest balls I've had in my mouth in a while.
Comment
Comment