Since I now see you are going S197...look up a build thread on Paul Faessler's S197 American Iron car or any Rehegan Racing S197 for Grand Am. Should find plenty of build info there.
Announcement
Collapse
No announcement yet.
A pair of 1:12th Mustangs
Collapse
X
-
I just replied to your PM lol. Thanks for the info.Originally posted by aggie97 View PostSince I now see you are going S197...look up a build thread on Paul Faessler's S197 American Iron car or any Rehegan Racing S197 for Grand Am. Should find plenty of build info there.
I spent about an hour working the paint tonight. Still a few areas that aren't completely smooth. Another couple of coats of bluethen I can clear it.
Sent from my SAMSUNG-SGH-I727 using Tapatalk 2Originally posted by LeahBest balls I've had in my mouth in a while.
Comment
-
Thanks. I am not a big fan of Grabber Blue on the full size cars. But it is bitchin' with the black wheels. I plan to put carbon fiber decals on the mirrors, spoiler, hood insert, and lower portions of the front and rear bumpers. Should help break the blue up a bit more and give it a bit of a track rat feelOriginally posted by Trip McNeely View PostFucking sick looking. I wish I had the patience. lol
Sent from my SAMSUNG-SGH-I727 using Tapatalk 2Originally posted by LeahBest balls I've had in my mouth in a while.
Comment
-
A little more work this morning, got another coat of paint on the body, and a few engine details done. I need to fix my digital camera so I can get some better pictures.
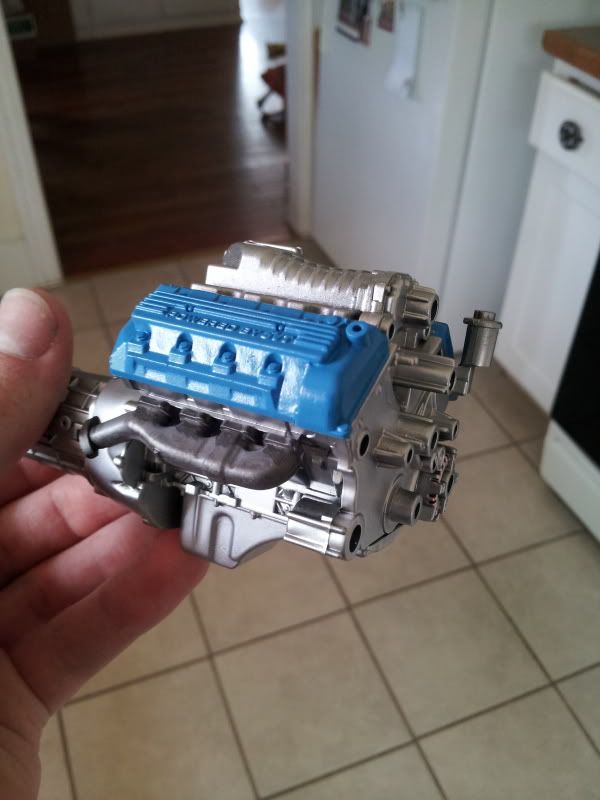
edit: looks like my phone takes decent pictures. I guess it helps this being a large scale model. You can sort of see the wiring on the alternator, all that is is some clear red bled into the reliefs.
Sent from my SAMSUNG-SGH-I727 using Tapatalk 2Originally posted by LeahBest balls I've had in my mouth in a while.
Comment
-
I decided to keep the kit supercharger. It is just resting in place for now while I decide how detailed I want to get (fuel lines, rails, fittings, etc). The color is Testor's model master line of metalizers "exhaust" I like the color and the finish.
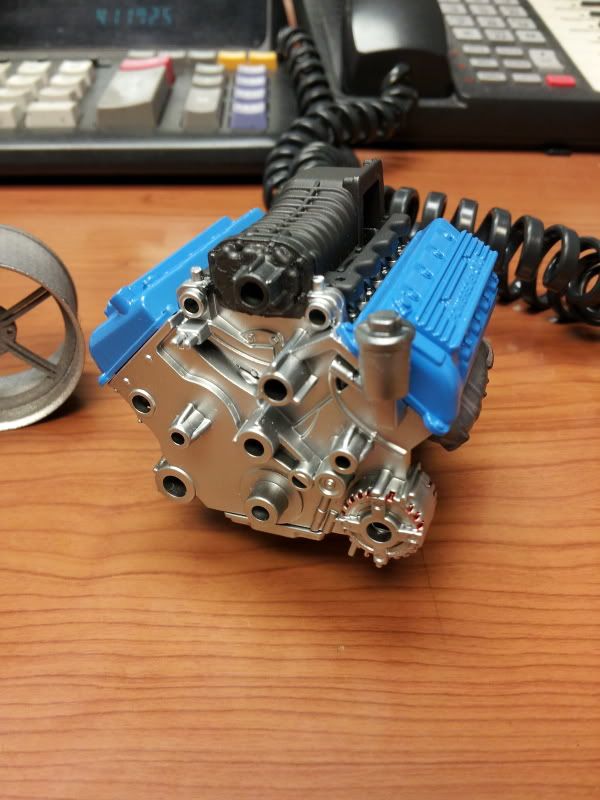
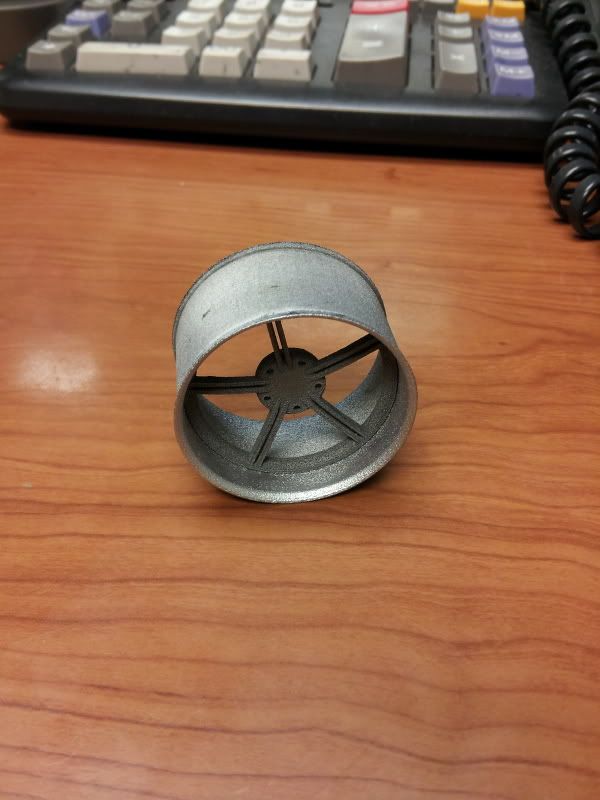
Some of you might recognize these, the wheels for my Camaro that I modelled in solid works. I didn't spend much time cleaning them up, I just wanted an idea of how real it would look. I am wondering if I have the sleeve printed in a better quality plastic and use the alclad aluminum paint followed with a urethane clear if they will look convincing enough for me. The centers were painted magnesium since my gunmetal was dried up.
Sent from my SAMSUNG-SGH-I727 using Tapatalk 2Originally posted by LeahBest balls I've had in my mouth in a while.
Comment
-
No pictures tonight. This will be the most work I have put into a paint job. I found a polishing set at Hobby Lobby the other day (3000-12000 grit sanding pads) and decided to see what happens with this. Before I would paint, level it out with 1000 - 1500 -2000 grit paper and clear. I never got good at polishing the clear, relying on the self levelling property of the urethane clear and hoping I didn't get any trash in it. Most of the time there was still orange peel in the paint because I was afraid of burning through the edges and having to repaint. I started the same way on this one, using 1000 & 1500 grit paper. Aftr burning through the paint I decided to see how the progression of the polishing kit worked. So far, this should be my best paint job. 95% of the orange peel is gone. I will have to touch up the paint in a couple of places. Then I will hit it with the 4000 grit pad and clear it.
Sent from my SAMSUNG-SGH-I727 using Tapatalk 2Originally posted by LeahBest balls I've had in my mouth in a while.
Comment
-
I tore my storage unit apart looking for my urethane clear and couldn't find it. It sucks because a quart is the smallest quantity I can get and its about $50. It will do a LOT of models but it is a hit in the beginning.
Sent from my SAMSUNG-SGH-I727 using Tapatalk 2Originally posted by LeahBest balls I've had in my mouth in a while.
Comment
-
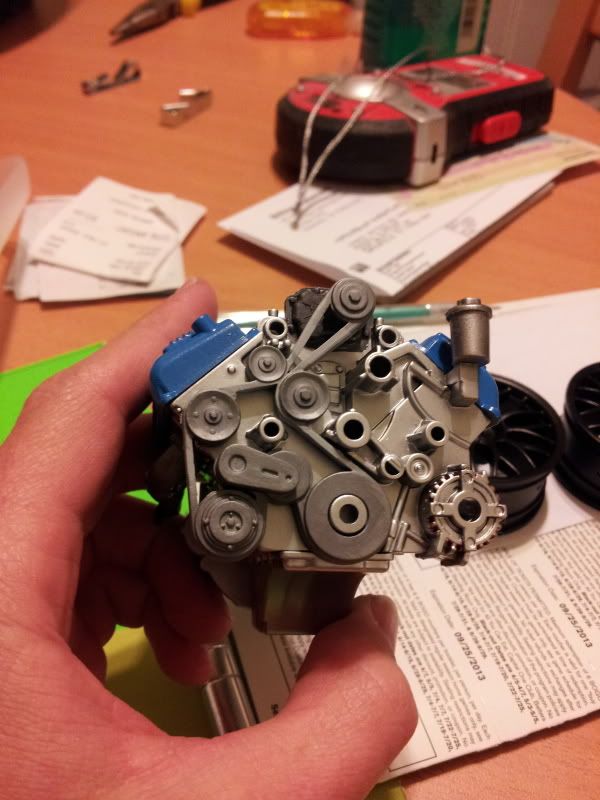
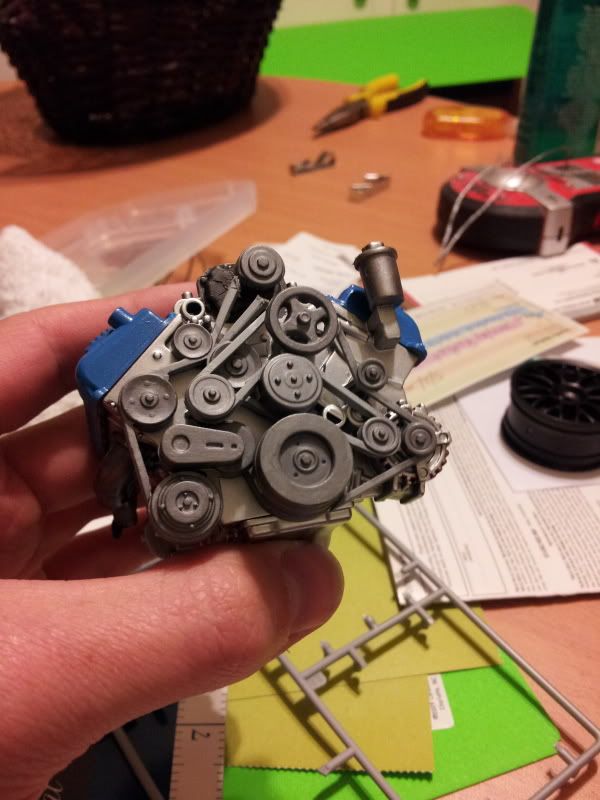
Did a little work tonight. I started the process of painting and separating the pullies. On these kits the pullies and belts are molded as one unit. This leaves a very thick belt, which looks out of place. I plan to separate all of the pullies and replace the belt with a thin strip of masking tape colored flat black. These pictures are my reference for pully location and belt routing. The pullies are painted testors metallizer "magnesium". Progress will be slow as I transition to a new job, and having to replace 95% of my paints because they have dried up.
Sent from my SAMSUNG-SGH-I727 using Tapatalk 2Originally posted by LeahBest balls I've had in my mouth in a while.
Comment
-
No the belt will be removed and replaced with masking tape. I am about to update thatOriginally posted by 4bangen View PostSo are you going to make them thinner, or replace the belt material? I found that the "plasticish" blue thin painters tape makes awesome belts.
Sent from my SAMSUNG-SGH-I727 using Tapatalk 2Originally posted by LeahBest balls I've had in my mouth in a while.
Comment
-
I spent a couple of hours working on the accessory drive set-up. As you saw in the previous post the belt is large and unrealistic from a scale perspective. So each pulle was separated, cleaned up, and attached. This may seem pretty straight forward, however, it is not. Since the pully systems are cast in two pieces (back belt and front belt) Revell felt the need to cut some corners and some of the pullies are free floating, meaning there aren't any true attachment points on the front cover
Here are all of the rear pullies attached
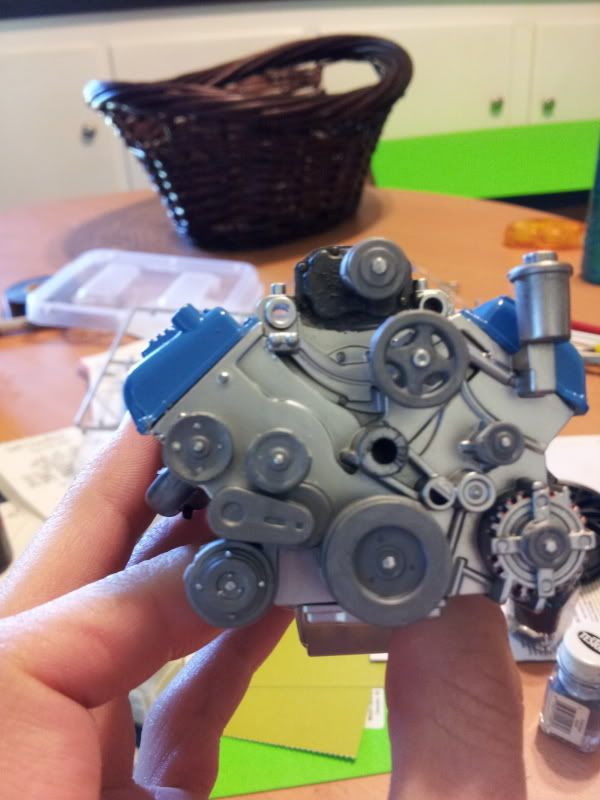
There were 3 pullies that I had to create mounts for. This was done with round styrene stock glued to the back of the pullies and holes drilled through the front cover so the stock could be attached and the depth adjusted
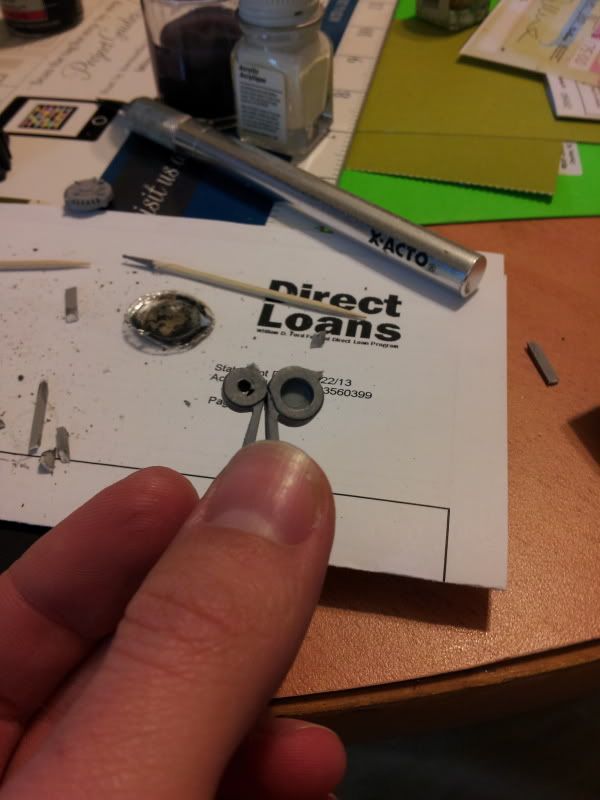
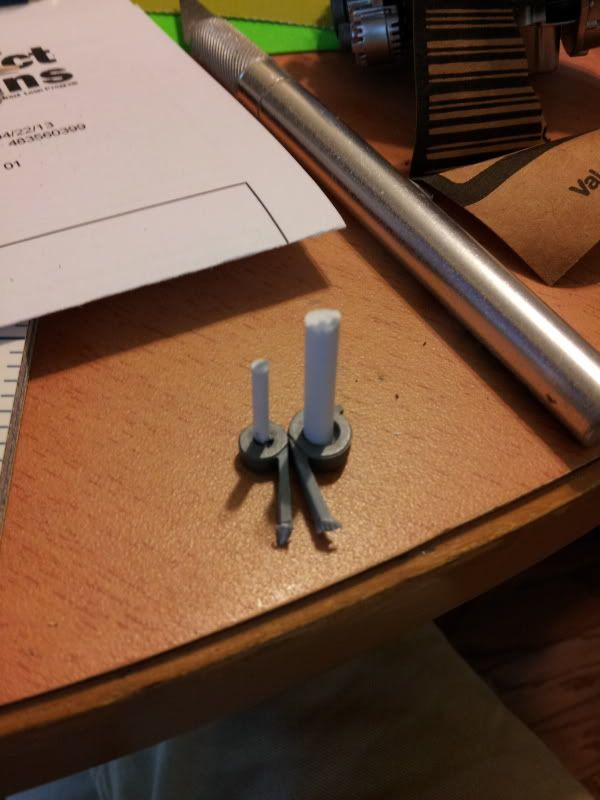
Once the rear pullies were attached a new belt was ran and then the front pullies were attached and the front belt ran. The belt is a piece of masking tape cut 2 mm wide and painted flat black
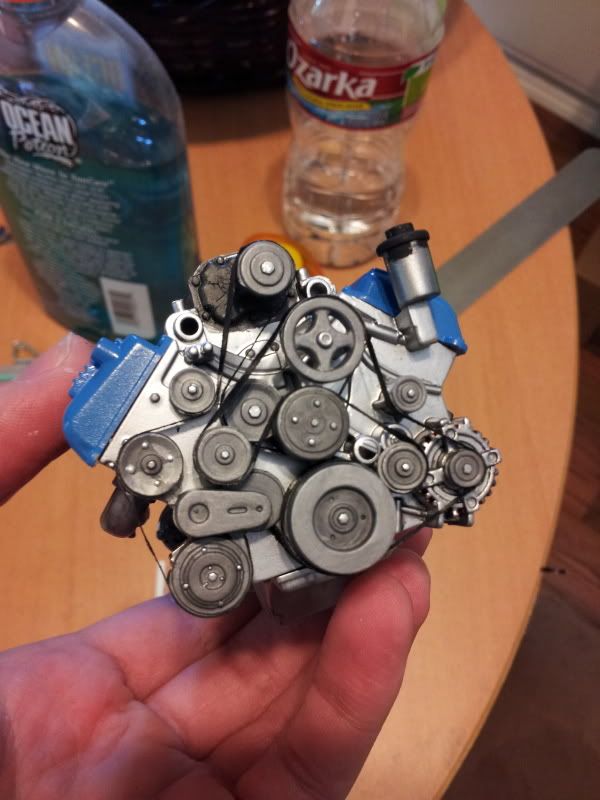
After that was done some detailing was done to the engine, bolt heads painted, a black wash was applied to pick out details in the block and pullies and also to knock down the shine of the aluminum paint.

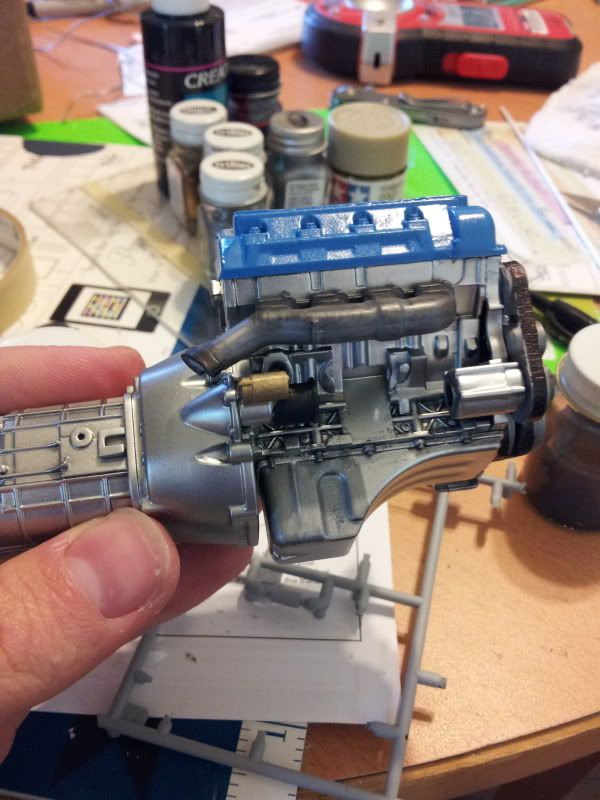
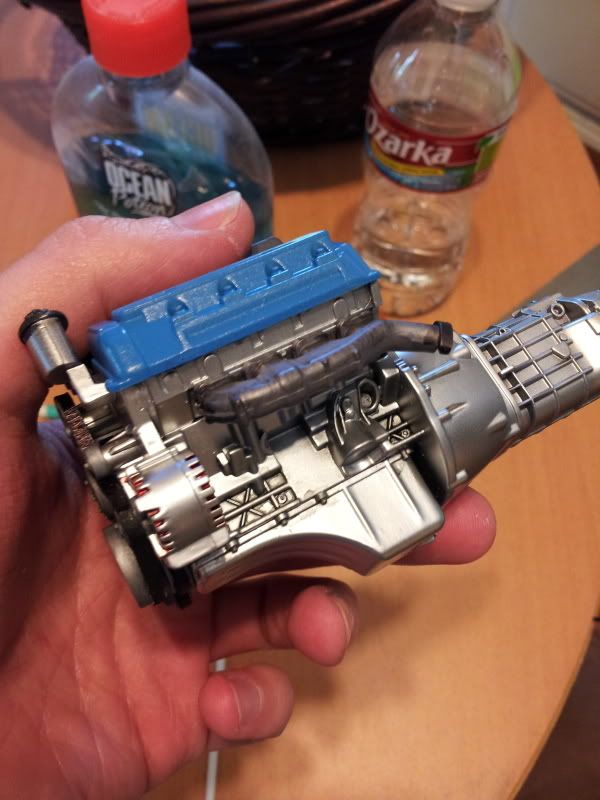
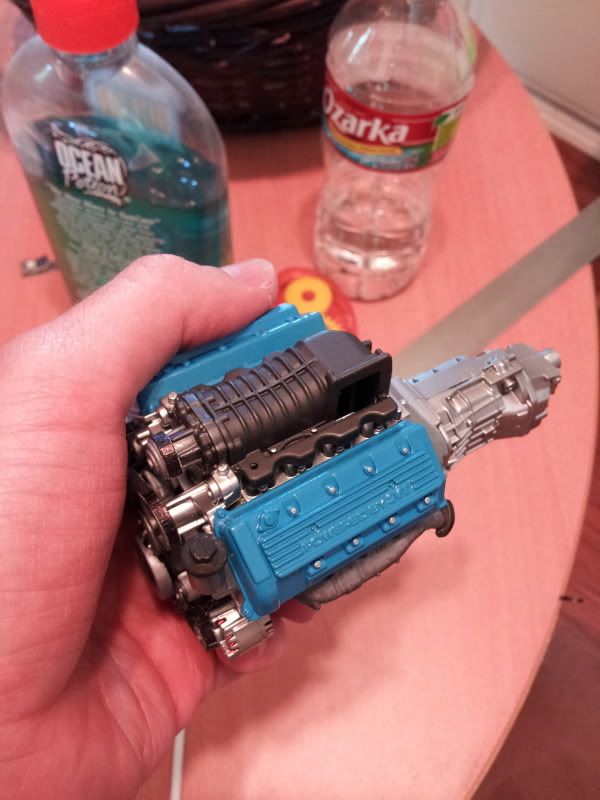
Sent from my SAMSUNG-SGH-I727 using Tapatalk 2Originally posted by LeahBest balls I've had in my mouth in a while.
Comment
-
Thanks! A little more detail painting, some wiring and fuel lines and I will be satisfiedOriginally posted by 4bangen View Postfantastic man. glad you ditched that 2x4 of a belt lol
Sent from my SAMSUNG-SGH-I727 using Tapatalk 2Originally posted by LeahBest balls I've had in my mouth in a while.
Comment
Comment