 Tweet
Tweet
Originally posted by 85whtgt
View Post
-
ALso Hydroban... I bought a 5 gallon online and it was $325 shipped. Should be able to knock out my shower that is 35sq ft (180sq ft of tile), bath tub surround and another shower. -
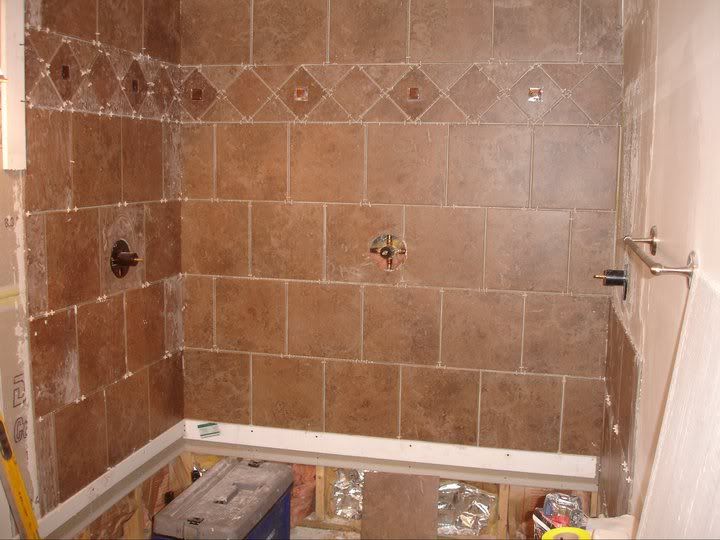
I have been a slacker on pictures, but here are some updates!


Comment
-
You're not done yet?
Comment
-
That trim is throwing me off for some reasonNon tapatalk Sig so the butt hurt va-JJs can stop crying about not being able to turn it off.Comment
-
What route did you go with the floor? Cement board right over subfloor?Comment
-
Used that same tile in my shower.
Comment
-
That's not supposed to be trim. It's supposed to go through the tile around the shower in the middle. The way it's set doesn't look right.Comment
-
I think it looks fine. Different, but not in a bad way.Comment
-
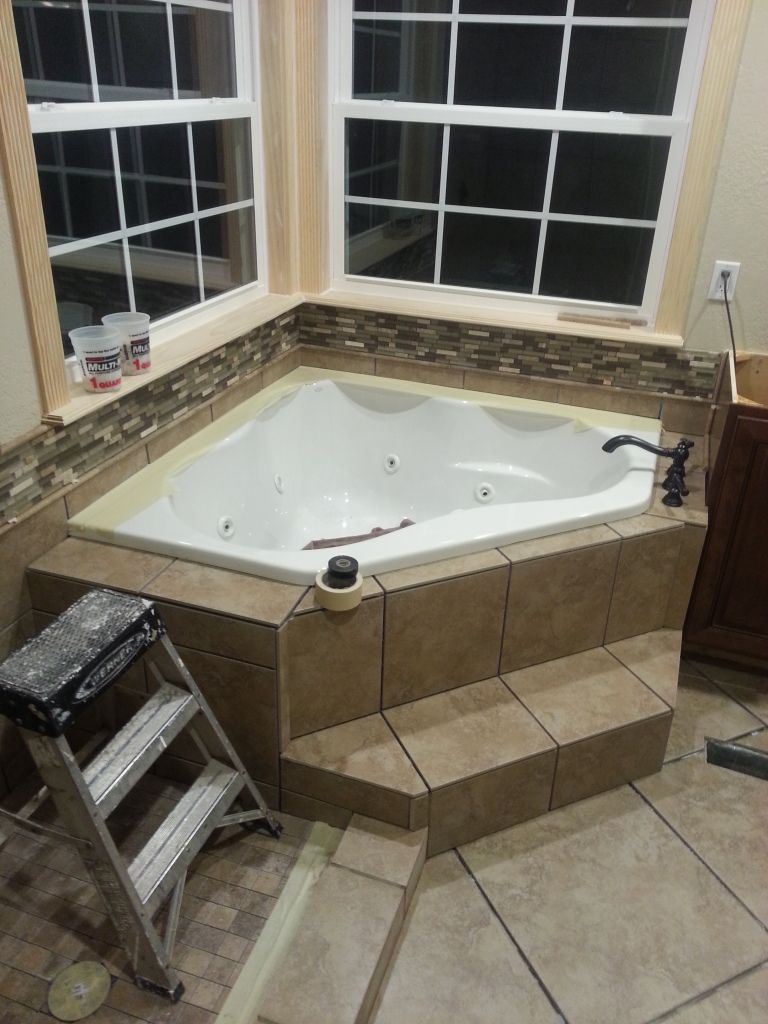
yea we are not very traditional style, we do not like the center thing, to each their own and make it your own if it is yours!!!
It is not done yet either, going to be another liner around it! We liked the framed looked that we did on our master and keeping that theme around house
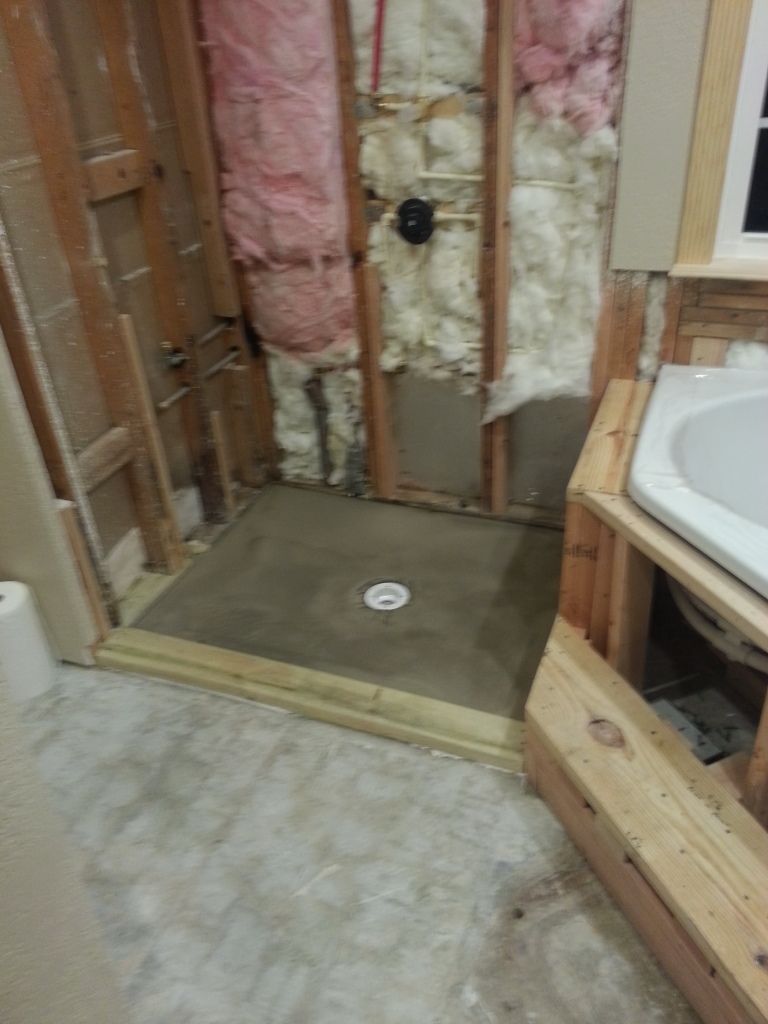
Yes we did 1/4 inch cement board and also used the flexbond thinset for a little flex on the sub floor. Right after we set the board then we used cement board screws every 6-8" across it to pull everything tight! Floor is SOLID now. Before we did that we also took decking screws and followed the studs down and put new screws across the entire floor to take creaks and squeals out. Seemed to have worked great!Comment
-
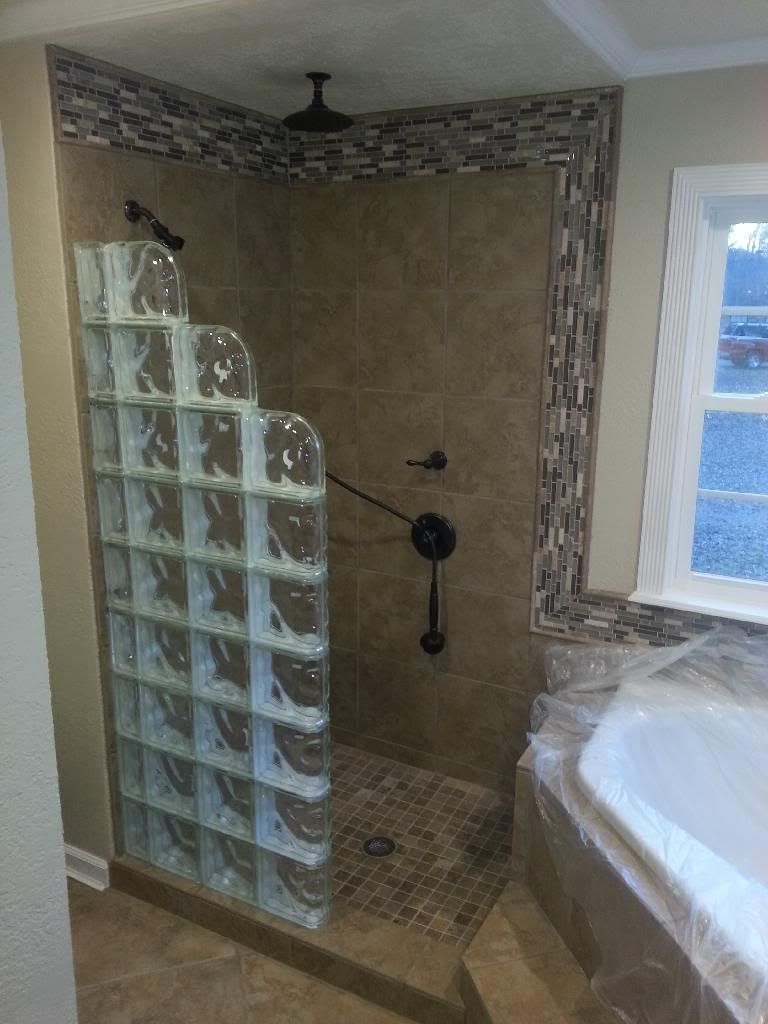
looks good do the clear blocks go right on the other tile with thinset or do they need something special to hold them up so they dont tip. Always wondered.
Comment
-
They actually make these channel guides that you use silicone to put onto each block and slide them together piece by piece. No thinset on bottom either just really strong silicon. Wall is pretty solid when it is all together.Originally posted by 03mustangdude View PostComment
-
Cool thanks for the info might have to steal your design for second bathroom, did you use the kerdi system to get the slope or use it by hand/level?Originally posted by zachary View PostComment
-
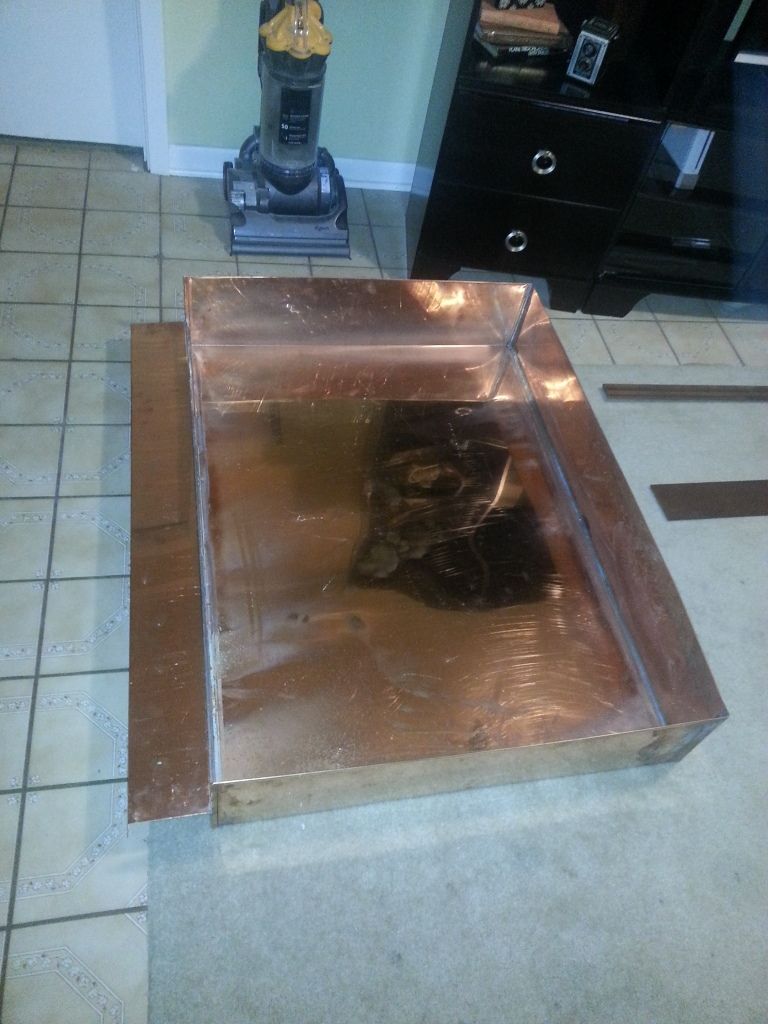
I do not like fact kerdi comes in pieces, I wanted something solid did not have to worry about so i went this way....Originally posted by 03mustangdude View Post
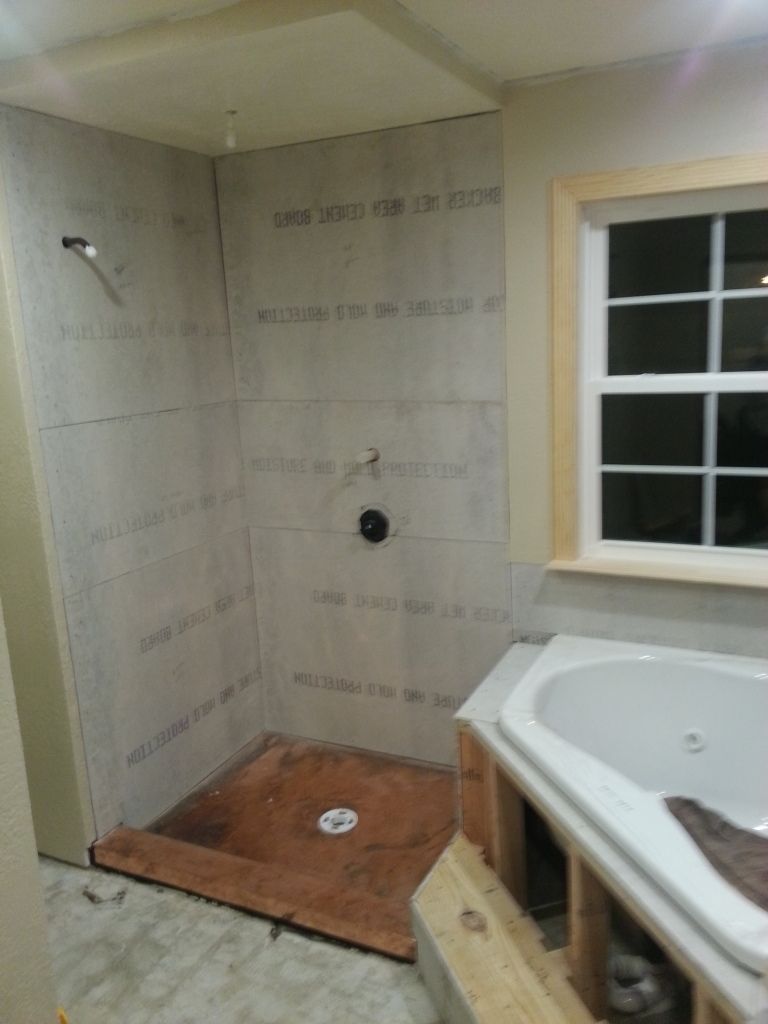
installed new drain, self leveling cement first to get a nice flat surface to work with, then actually had a copper pan cut and installed down to be sure no leaks no way!!!, build up outside a certain height, then work way toward drain. It is not perfect but all the water runs the right way and there are no puddles.
 Last edited by zachary; 07-14-2014, 10:05 AM.
Comment
-
Deflection might still be a concern, especially with the larger tiles. How thick was your subfloor? I just did the laundry room for an osb subfloor, which gave me the willies on the construction quality. Laid 3/4" plywood then 1/4" durock with no blocking.Comment
-
Like the copper pan idea but not really feasible in my situation.Comment

Comment